Setup
After installation of Shopify Connect extension into Microsoft Business Central, several setup tasks should be performed:
Shopify Setup
This is general part of setup
-
Choose the 🔎 icon, enter Shopify Setup, and then choose the related link.
-
This will open Setup page:
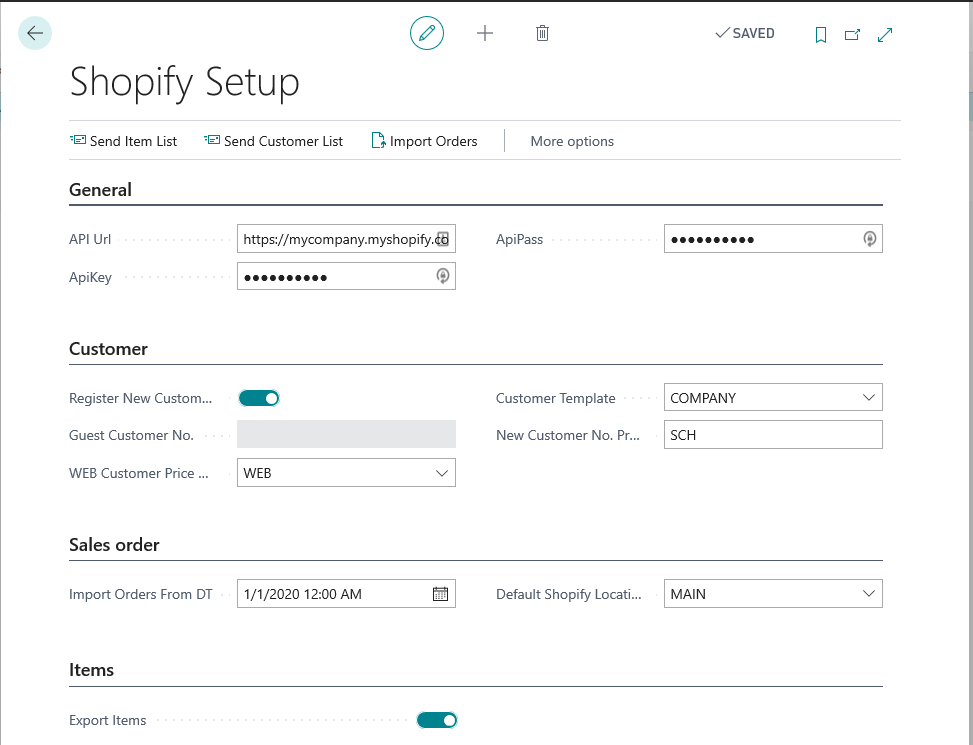
On the General fastTab
-
API Url = address of your Shopify administration page. It should be like https://mycompany.myshopify.com/admin/ .
-
ApiKey = API key from Shopify Private Apps page. (see section Generate Shopify API key and password )
-
ApiPass = Password from Shopify Private Apps page. (see section Generate Shopify API key and password)
On the Customer fastTab
System identifies shopify sales order customer by searching it’s e-mail address in customer list. User can choose system behaivour when it receives order from unknown customer – 1) for every new customer create new Customer Card , or 2) use one generic Customer card (guest customer) to register such sales orders.
-
If user wants that system create use one generic customer:
-
switch-off selector Register New Customer
-
insert that generic customer number in field Guest Customer No.
-
-
If user wants that system for every new customer create new Customer Card:
-
switch-on selector Register New Customer
-
select template code in Customer Template. System will use this template to create new customer data. Please check that template has values in fields Gen. Bus. Posting Group, VAT Bus.Posting Group and Customer Posting Group.
-
Insert prefix in New Customer No. Prefix if you want that new customer number have prefix before number, to separate those customer from other.
-
-
If user wants to send customer information from system to Shopify:
-
select curtomer price group code in Web Customer Price Group
-
in customer data for customers that should be sent to Shopify, set Customer Price Group code same as in Shopify Setup field Web Customer Price Group
-
Warning – when you set Web Customer Price Group in Shopify Setup and in Customer cards, system will automatically send new and updated customers information to Shopify.
On the Sales Order fastTab
-
Import Orders From DT = Insert here date&time if you don’t want to impoert orders older then this date&time.
-
Default Shopify Location = insert here location code, that will be used for imported sales orders.
On the Item fastTab
- Export Items = switch-on selector if you want to export Item information (new items, updated items) from system to Shopify. This will need additional setup (see ”Item Export Setup”).
Generate Shopify API key and password
For Business Central to be able to connect to Shopify, it is needed to create private app connection inside Shopify security settings.
-
In shopify admin page (https://mycompany.myshopify.com/admin/), open click Settings > Apps and sales channels.
-
Click Develop apps.
-
Click Allow custom app development.
-
Read the warning and information provided, and then click Allow custom app development.
-
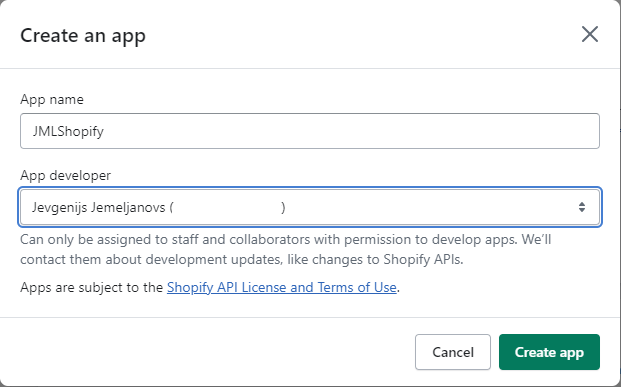
Press button ”Create an app”.
-
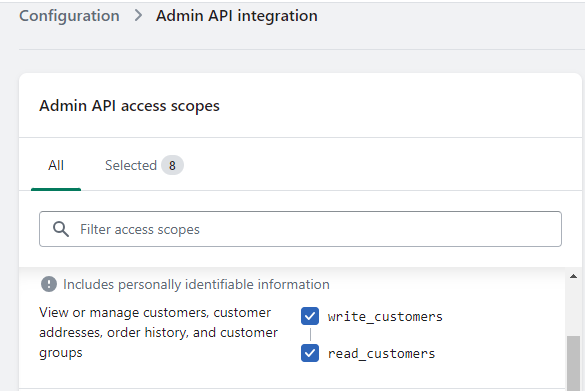
In new app, press ”Configure Admin API scopes”, select credentials:
-
Customers: write_custgomers
-
Inventory: write_inventory
-
Orders: write_orders
-
Products: write_products
-
-
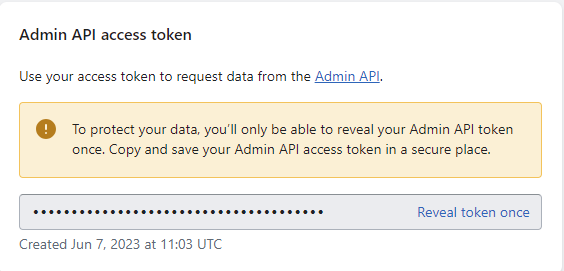
Press ”Install App”.
-
Open API credentials section, your app key and password will be displayed in fields:

API password is hidden under ”Admin API Access token” section, press button ”Reveal token once” to see it.
Item Export Setup
Before exporting Items from system to Shopify product list, user must
-
create/update Item Categories list in system and
-
create/update Collections list in Shopify.
Item will be exported to Shopify only if item is applied to Item Category that exists in Collection list in Shopify.
-
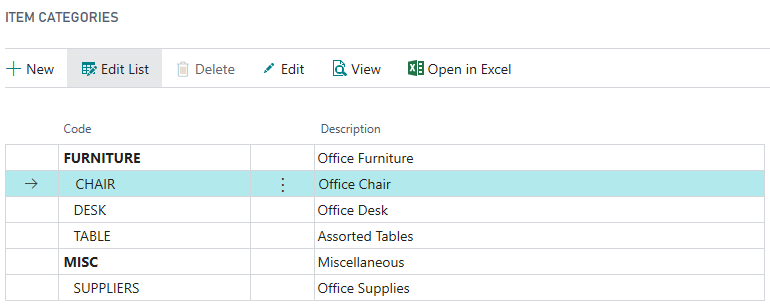
Choose the 🔎icon, enter Item Categories, and then choose the related link.
-
Code = code of Item Category, ex. CHAIR
-
Description = description of category, ex. Office Chair
-
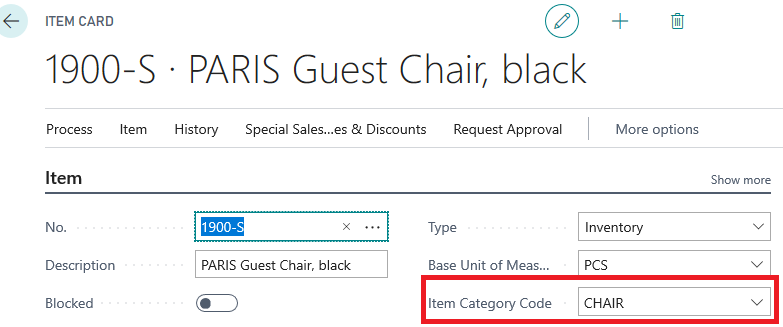
Choose the 🔎 icon, enter Items, and then choose the related link.
-
For each Item, that will be exported to Shopify, open Item Card, and select value in filed Item Category Code
-
In Shopify Admin page, create list of equivalent collections
-
Open collections webpage, https://mycompany.myshopify.com/admin/collections
-
press Create Collection,
-
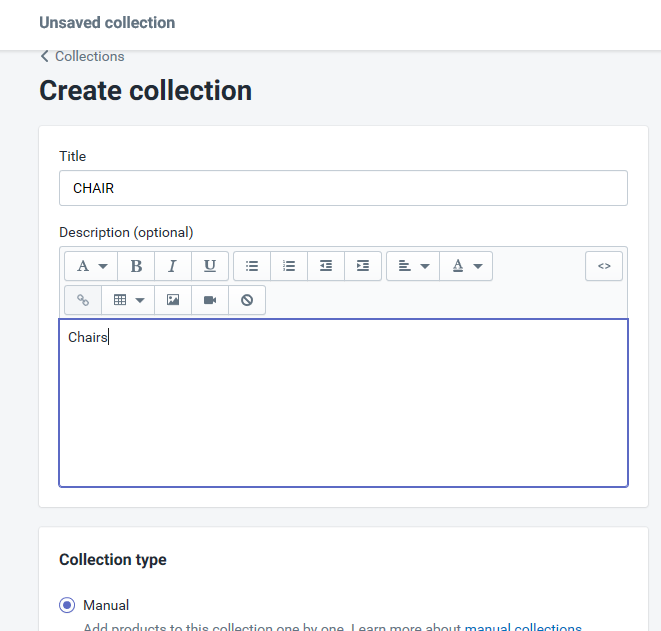
-
Title = must be same as system’s Item Category Code.
-
Collection Type = must be Manual.
Warning – when you set Export Items switch on in Shopify Setup and create Item Category list, system will automatically send new and updated items information to Shopify.
Mapping of fields you can find in section “Items export – fields mapping”.
Note - from Business Central to Shopify will be send list of items together with Item Variants.